Categories
Uncategorized

Getting Started With Mobile Testing

Over at Ministry of Testing they have put together a nice mind map that serves as a great starting point of things to consider for testing (as well as development and design) when you’re starting a mobile project. I’m hoping at some point somebody will make platform specific ones for Android and iOS. If not… maybe I will. Anyway, head on over to check it out: Getting Started With Mobile Testing – A MindMap


Categories
Networking Uncategorized

Charles Proxy: Like One of the Family

When it comes to testing slow network conditions, we already covered Network Link Conditioner. But what’s that you say? You’re wondering if there’s a more robust and extensive tool for network testing and debugging? Well I’m glad you finally asked, because as it turns out, there is, and his name is Charles. Charles Proxy is a cross-platform proxy application that can be used to monitor and manipulate traffic. Go download and install the trial so we can get started.

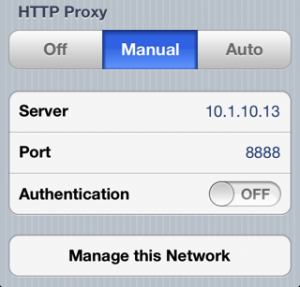
After starting up Charles you’ll need to configure your device to route its traffic through your computer (unless you’re using the sim, in which case you can skip this part). With your computer and iOS device on the same network, go to your iOS device Settings, then go to Wi-Fi and tap on the blue circle with a white > in it to the right of your network. Scroll to the bottom and under HTTP Proxy, tap Manual. For the Server, enter your computer’s IP address and for the port enter 8888. Close Settings and now your device’s traffic should be going through Charles.

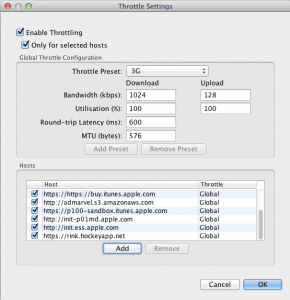
As previously discussed, Network Link Conditioner lacks the ability to specify which traffic you want to throttle; it’s an all or nothing deal. So first, let’s look at Charles’ throttling feature. Go up to the Proxy menu and select Throttle Settings. Check “Enable Throttling” and “Only for selected hosts”. The throttle settings aren’t much different than NLC, but the “Only for selected hosts” option is something new to us. Any hosts added to the list at the bottom will be throttled according to your settings and all other traffic will go through the proxy unthrottled. This makes testing poor network conditions much more tolerable as you can now slow down your app’s traffic while still listening to your Dubstep Nickelback playlist on Pandora uninterrupted. So add whatever hosts you want to throttle to that list. You can easily toggle throttling on and off by pressing ⌘-T at any time. So now that you’re set to test your app on a slow network, let’s have a look at what else we can do with Charles.

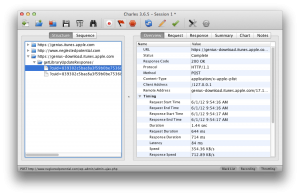
By now you might be seeing some URLs appear in the Structure (left) pane of Charles’ main window. These are all the URLs of requests that have gone through Charles so far this session. If your window is still blank, then you must not have much background traffic going on (or you’re not recording in which case, click that record button up top that looks like… well, a record button). Expanding any one of the URLs will show which files on that site are being hit. As you select them, in the right pane you can see more information like the request to the server and the response that came back. If your application is using SSL for its connections, Charles has you covered there too. You’ll just need to go install Charles’ SSL certificates for your computer and for your iPhone (iOS 4 instructions also work on iOS 5 & 6).

Once you have the correct certificates installed, you’ll need to explicitly add all hosts that you want to enable SSL proxying for. While you can just add a wildcard to enable SSL proxying for all hosts, there are a number of websites that won’t play nicely with the type of man-in-the-middle attack Charles uses to make SSL proxying possible. Instead it’s recommended that you explicitly add hosts that you’re actually interested in looking at. You can manually add these hosts under Proxy > Proxy Settings > SSL, or if the host you want to proxy already appears in your list of traffic for this session, you can simply right-click on the host and click SSL Proxying. Now any SSL requests made to that host should show up, and the contents of the request and the response should be visible.

The last feature of Charles that I want to touch on right now is the ability to map to local files. Normally your application will make a request and the server will send it a response. Often times for testing, it’s extremely useful to be able to manipulate the server’s response, especially in apps that rely heavily on data from a server. For example, you might want to verify that your application can handle invalid JSON (I’ve previously run into a 3rd-party JSON parser that crashed when it got invalid JSON), but in testing the server might always give you a valid response. Usually to test this I’ll start by having my application make a normal request and receive a normal response. Then in the Structure pane of Charles, find that request, right-click on it and select Save Response. After saving the server’s response locally, you can edit it to your heart’s content. Once you’ve made whatever edits you want, back in Charles right-click on the request again and now select “Map Local…”. In this dialog you can set the local path for the file that you would like Charles to use (the one you just saved and edited) in place of the server’s response. Now the next time your application makes this same request, Charles will hand it your local file instead. You can use this feature to test for things like making sure your app handles long strings of text, large numbers, or blank values. You know, all those scenarios developers say won’t happen, but they always do. You can manage all the requests you have mapped locally under Tools > Map Local…

So there you have it kids. Charles Proxy is a powerful tool for testing and debugging your applications and their traffic. Hopefully this has helped you get started. The Charles Proxy website also has excellent documentation if you find yourself stuck on something or want to learn more about its other features.

Categories
iOS

Syncing iOS Screenshots With Your Mac

I recently came across this brilliant post by John Marstall that walks you through getting your iOS devices to instantly sync their screenshots to your Mac using Photo Stream. My struggles with subpar 3rd party apps and email to accomplish this task are finally over.

The Easy Way to Get iOS Screenshots On Your Mac

Thanks for making all of our lives so much easier, John.

Categories
iOS Networking Uncategorized

Slow Your App’s Roll

Update : As of iOS 6, it is now possible to use Network Link Conditioner directly on the device. Additional details can be found in this post.

Note: After upgrading to Mountain Lion, Network Link Conditioner was not working for me. Steven has pointed out in the comments below that this can be resolved by removing and re-installing the prefpane. Thanks for the tip, steven!

One shortcoming of testing in iOS Simulator is you don’t get to test how your app does in real world network scenarios. The solution? Network Link Conditioner.
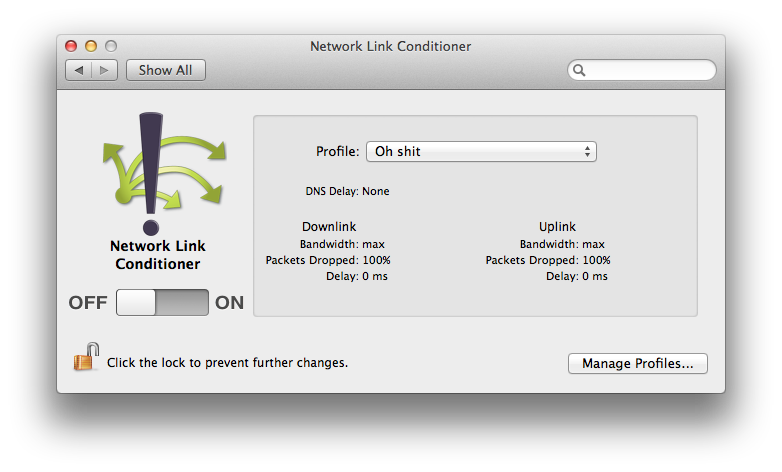
Network Link Conditioner is included with Lion’s Developer Tools. You can install it by going to Applications > Utilities > Network Link Conditioner and double clicking the prefpane file. If you don’t see the Network Link Conditioner folder, you can open Xcode, go to the Xcode menu > Open Developer Tool > More Developer Tools…, then grab the Hardware IO Tools for Xcode download (Apple developer account required). Once you have it installed, open up System Preferences and you should see Network Link Conditioner listed at the bottom under Other.

After launching it, you’ll see there is a Profile drop-down that lists a number of preconfigured network scenarios including various 3G and EDGE profiles. If you click on Manage Profiles you can also create your own custom conditions in there to suit any needs you might have (for example, simulating a completely dead network where no traffic gets through). Playing around with my own profiles a bit, I found a pretty good mix with bandwidth set to 85kbps and packets dropped set to 15% for both downlink and uplink. I get a pretty good mix of some things loading and others timing out with those settings.

If you’re using iOS Simulator, you don’t need to do anything special to route your traffic through Network Link Conditioner (except turning it on). However, if you’re testing on a device, you’ll need to proxy your device’s traffic through your computer. The details are beyond the scope of this post, but I will say that I use Charles Proxy for this. I’ll cover the specifics in a later post.

A couple of caveats to note when using Network Link Conditioner. The first is it seems to lock itself about every 5 minutes. So you may find that you frequently need to re-enter your password to turn it on and off while testing. The other drawback worth noting is that Network Link Conditioner is system-wide and has no ability to distinguish between traffic. It doesn’t care about the color of your traffic or the content of its character; it treats all your traffic the same. This means when testing very poor conditions you have to say goodbye to IM, email, loading your ticket tracker, and that sweet dubstep remix you’re playing in the background on YouTube. Obviously this isn’t ideal and I hope that Apple will extend functionality in the future to customize the tool’s reach. It’s for this reason that often times I prefer to use Charles Proxy which has a Throttling feature with similar functionality to Network Link Conditioner, and you can customize which traffic you want it to affect. None-the-less, Network Link Conditioner is a great, easy-to-use, free tool that’s extremely useful in uncovering bugs you may have otherwise missed.

Now that we’ve covered the how, let’s talk a little bit about the why. As shocking as it may be to hear this, cell phones aren’t always connected to a speedy, reliable network. Every thing from a weak signal, to slow public wi-fi, to Sprint’s data network can result in poor network performance for your user and some poor conditions for your app to work under. While you can’t control the quality of the network your users are connected to, you can ensure that your app handles the poor conditions as gracefully as possible. It’s important to use a tool like Network Link Conditioner or Charles Proxy (or a terrible cellular connection) to weed out any bugs that may manifest in these poor conditions and make sure the overall user experience is still a good one.

One big no-no to this will help check for is doing network requests on the main thread. If you’ve ever gotten crash reports with an exception code of 0x8badf00d, you may already be familiar with this problem. Essentially if your app makes network requests on the main thread and it occurs on launch, a slow network could mean your app won’t successfully launch in time and watchdog will kill it before your user even gets it open. This type of issue can be very easy to miss during development and QA because your office wi-fi will likely load things quickly enough to avoid this problem. But as soon as a user in the real world with a poor network tries to use your app, the 1-star reviews will start rolling in.

Once you’ve made sure you don’t see any crashes in your application, turn your attention to the user experience. Even under poor conditions, your application should have some kind of messaging to your users about what’s going on. Failing gracefully is important— in your apps and in life.  A big point of frustration for users can be if your app is loading data (especially if it’s taking a long time) and you’re not conveying that to them in some way. When you’re loading data, tell the user. Using iOS’ network activity indicator icon that’s in the status bar is a good start, but often times it’s beneficial to show a loading indicator within the app, either as an overlay or in the portion of the app where you’ll display the data once it’s loaded.

If your data requests timeout or otherwise fail, once again, make sure you’re telling the user (preferably not with an alert dialog). Tweetbot has an implementation for this that I really like. If your pull-to-refresh fails, you get a nice little notification that slides down from the top to let you know and after a few seconds disappears, not requiring any user interaction and not disruptive to the app’s flow. On a related note, putting a timestamp in your pull-to-refresh bar that says when the last successful update from the server occurred can also be very helpful to users. It’s a simple way for users to see how stale their data is.

Finally, be sure to test bad network conditions on a clean install. Your users may very well be on a bad network the first time they launch your app and not have the luxury of some data already being cached. If your app relies heavily (or entirely) on data requests going across a network, your poor user stuck on a flight with no wi-fi should be able to see something other than completely blank views. Even if your user’s network fails, your app doesn’t have to.

Categories
iOS Simulator Uncategorized

Testing Memory Warnings in iOS Applications

A common cause of problems in iOS applications can be memory warnings. In the simplest terms, when the device is running low on available memory, iOS issues a memory warning which tells all running applications to stop being so greedy and to free up any memory they don’t absolutely need (and if that doesn’t free up enough, it will just start ruthlessly slaughtering them one by one). If an application doesn’t handle this properly and does something like release an object from memory without unlinking it, you can get a crash. Often times this will arise when a user has drilled down several views deep, a memory warning occurs, and as the user navigates back up the stack… kaboom! Let’s say a user is in an application, which has a photo albums view, and from there the user selects an album, and in that album they select a photo. So we have something like: Photo Albums view > Album view > Photo view.
Normally when you’d come back to something like the Photo Albums view, it would have a reference stored of which photo album you tapped on so that it could do a fancy deselect animation when you came back up out of your album view. So let’s say you’re on Photo Details, a memory warning gets issued and in an attempt to free up memory, the application releases the contents of the Photo Albums view, including the cell that you tapped and which it is holding a reference to. As you come back out of the stack to the Photo Albums view, the application will try to reference the cell for the album that you tapped, and be like “WTF? That cell doesn’t exist.” Naturally the application will throw a temper tantrum at this point, or in more technical terms, it will crash. This is just one type of scenario that can cause a crash from a memory warning. (I might cover more later, but for now it’s just important to know that nested views are where to look for these issues). Memory warnings, like all relationships, occur naturally in the wild all the time, but it’s so much easier if you can just force them to happen when it’s convenient for you. Fortunately for us, iOS Simulator provides this functionality. You can simulate a memory warning by going to the Hardware menu in iOS Simulator and selecting Simulate Memory Warning (who knows why they named it something so cryptic). You should go ahead and set a keyboard shortcut for this now because you’ll be using it a lot from now on. For this just go to System Preferences, then select the Keyboard preference pane. Then select the Keyboard Shortcuts tab, select Application Shortcuts in the left pane, then click + at the bottom. Set Application to iOS Simulator, Menu Title to Simulator Memory Warning and your shortcut to whatever you want (I went with ⌘-1 because I think memory warnings are A #1). Also remember as you’re finding these crashes to note the path you took through the views to make it happen; no need to give developers another reason to curse your name.

So now you can open up some bugs for your developers with all the crashes you’ve found. Sadly, your developers will get these crashes fixed and resolve your tickets just as you’re getting the hang of cruising around the app jamming on ⌘-1. You’ve spent your penny on the mechanical horse ride, but now it has stopped and Mom’s telling you to get off. Fear not! Crashes are only the most obvious bug to spot with memory warnings. So… what else can we look at?

Using apps should be an immersive, consistent, fluid experience for your users. One consistency that a user expects in an application is that however they leave a view, when they come back, it will be the same. For example, if you’re using the music app and you scroll down the artist list to V and tap on Vanilla Ice, when you come back to the list of artists, you expect the view to still be down in the Vs. If every time a memory warning happened while you were listening to music it meant that the Artists scroll view got reset to the top, that’s a frustrating experience. It’s important to note the different properties of your views and make sure that they are being preserved accordingly after memory warnings.

A couple of other things that are sometimes lost are the currently selected tab if you get a memory warning while a modal view is up as well as tapped cells being deselected when you come back to the view. Sometimes your developers have made sure the app won’t crash, but overlook proper behavior like deselecting a cell. Many users may not notice these details on a conscious level, but this kind of polish is what can make the difference between a good app and a great app.

Sometimes you’ll find yourself needing to test particular views on a device that don’t show up in the simulator. The easiest and quickest option for this is to launch some other applications that will eat up memory. So first plug your device in, then open Xcode and from the Window menu select Organizer. You should see your device over in the left pane with a Console option below it, select that. This is where you can get a behind-the-scenes peek at what’s going on with your device and where we’ll see when a memory warning occurs. Now that you know where to look to see when a memory warning happens, let’s figure out how to make one happen without our simulator.

One way to eat up some memory is to start a recording with Voice Memos. This option has the added luxury of allowing you to run your app in the foreground while the recording is still going and eating up memory. (It can also help you test to make sure your app resizes views properly, but we’ll go into that another time). Safari and Camera are two more apps that act like they’re trying to win Hungry Hungry Hippos when it comes to memory. In fact, for a while (I think on  iOS 5.0 or 5.0.1), if you had Voice Memos recording and tried to take a photo, both apps would crash from using too much memory. What you’ll be looking for in the console output is something like this: unknown Camera[13081] <Warning>: Received memory warning.

When you see your app receive a memory warning like this, you can then go back to your app and make sure everything still looks okay. One downfall to this method is depending on how low your device is on memory, you might find that your app has freed up more memory than you wanted it to. Instead of being taken back to the view you were expecting, you might be greeted by a splash screen indicating your application got completely killed as a result of the memory warnings (playing Infinity Blade tends to have this result). So this might take a little playing around to find the right combination of apps for you.

One final option, if your developers really love you, might be to have them put code in your debug builds that gives you buttons right in the app to generate memory warnings. This is extremely helpful for testing memory warnings on devices, but might not be an option for everybody. If it’s not an option, you might try searching around for somebody who has already written some memory warning code and made it freely available, like this guy. (Note: I haven’t tried this code, just came across it. Let me know if you have luck with it.)

As you can see, memory warning problems can manifest in a number of different ways. Hopefully with the info above, you’ll be catching these before your users do.

(Thanks to Chris Weathers for help with the explanation of memory warnings.)

Categories
Uncategorized

And So It Begins

After months of contemplation and procrastination, I’m finally going to start this site. In my last year of doing QA on iPhone and Android applications, I’ve come across various tools, resources and information to make my job easier and to help me do it better. Each time I’ve had a problem to solve, I’ve wished there was a site or a community dedicated to mobile testing where I might find solutions or a step in the right direction. And every time I’ve found an answer, I’ve wished I had a place to share it for anybody else tackling the same problem. This site will hopefully make this information easier to find and more accessible to those in the same boat. I also encourage those who come across the site and have questions or something to contribute to reach out so we can either share the discoveries here or help answer questions.