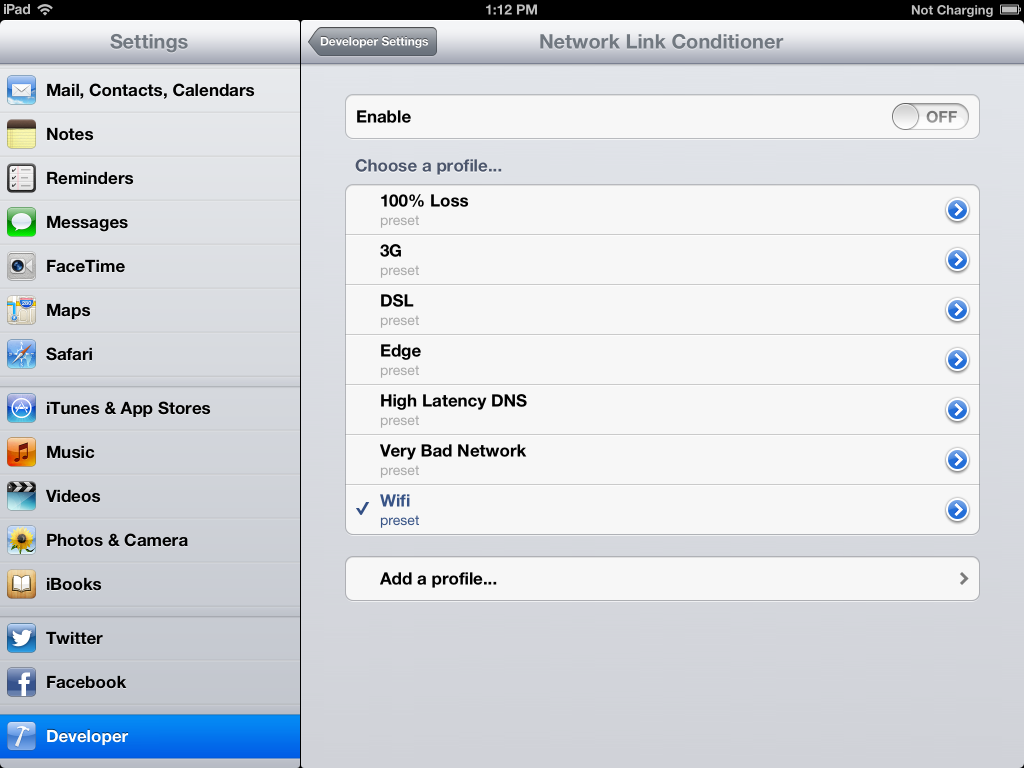
I previously covered using Network Link Conditioner to test how your app does in less- than-ideal network scenarios. One of the inconveniences of using it is in order to test your app on a device, you have to take the extra steps to configure a proxy on your computer that your device can connect to over a wi-fi connection. Well, not anymore. With iOS 6, Apple has given us Network Link Conditioner right on the device.
To get started with Network Link Conditioner, first your device must be set up as a developer device. If you haven’t done this yet, you’ll need to go to Xcode, open Organizer (Shift-Command-2), select your device, and click the button that says Use for Development to add the device your developer account. Once you’ve done that, you should be able to open Settings on your device and see a Developer menu near the bottom, just above the apps list. Tapping on that reveals some helpful settings, Network Link Conditioner Status obviously being the one relevant to our interests here.
The options available should look familiar if you’ve previously used Network Link Conditioner in OS X. There are some useful presets immediately available to you, and you can also set your own by adding a profile. One notable difference from OS X when creating your own profile is the ability to specify the interface, so you can create profiles that only affect 3G or only affect wi-fi (or both) which is nice. Once you have the profile you want, enable Network Link Conditioner and you’re good to go.
Be careful to not leave Network Link Conditioner on once you’re done testing as there is no indicator in the status bar or anywhere else outside of Settings to tell you that it’s on. I foresee many occasions where I forget to disable Network Link Conditioner, then later wonder why my connection is so slow.While Charles Proxy stills gives you more control for network testing, it’s really nice to have the option to test a slow network without needing to run a proxy, have my Macbook Pro out, or have my device on a wi-fi network with my laptop. Now you can just pull out your device, enable Network Link Conditioner, and quickly (or rather, not so quickly) test different network conditions right on your device.

11 replies on “Using Network Link Conditioner in iOS 6”
Thanks for the blog and articles, they’re rally helpful. Could you please fix rss (I know, rss is dead and so on…) http://www.neglectedpotential.com/feed/ doesn’t work.
Thanks for letting me know it was broken. I’ll try to get that fixed for you.
I’ve got Network Link Conditioner installed on my Mac OS X Lion 10.7.5 but after I change the profile to Edge, Average Case or something similar, turn it ON, nothing happens. I run speedtest.net and still get 18 mbps download. All internet pages in Chrome and Firefox run at a high speed instead of 240 kps. Am I missing a step?
Thanks,
Andre’
…and I did reboot without any effect.
Andre: I gave up on trying to get NLC to work in OS X. I’ve had times where it works and times where it does absolutely nothing. Sometimes uninstalling and reinstalling the preference pane has worked, and other times the problem continues. NLC on the device itself still seems to work fine, and if I need to slow down traffic in OS X, I just use Throttling in Charles Proxy these days.
[…] there’s also a Network Link Conditioner in iOS […]
[…] differences between 3.5” and 4” iPhones, and other performance issues. Tools like the Network Link Conditioner can help, and there’s even an official RubyMotion guide for debugging. It’s easy to […]
Thanks! the tool is a big help.
Hi I had this settings with using Xcode (I use windows not mac) how do I get it back? Configuration profile?
Sorry I meant without
Thanx a lot , its really helpful